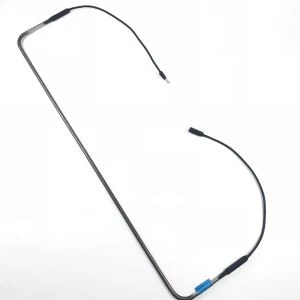
Replacing the defroster blower motor in your car is a task that, while it may seem daunting at first, can be accomplished with the right tools, a bit of patience, and some basic mechanical knowledge. As a defroster supplier, I've seen firsthand the importance of a properly functioning defroster system, especially during the colder months. In this blog post, I'll guide you through the process of replacing the defroster blower motor in your car, step by step.
Why Replace the Defroster Blower Motor?
The defroster blower motor is responsible for pushing air through the defroster vents, which helps to clear the windshield of frost, fog, and ice. Over time, the motor can wear out due to normal use, or it may fail due to electrical issues or a mechanical problem. A faulty defroster blower motor can make it difficult to see out of your windshield, which is a safety hazard. If you notice that your defroster isn't working as well as it used to, or if you hear strange noises coming from the blower motor, it may be time to replace it.
Tools and Materials You'll Need
Before you begin, gather the following tools and materials:
- Socket set
- Screwdriver set
- Pliers
- New defroster blower motor
- Safety glasses
- Gloves
Step 1: Disconnect the Battery
The first step in any automotive repair job is to disconnect the battery to prevent electrical shock. Locate the negative terminal on your car's battery and use a socket wrench to loosen the nut that holds the cable in place. Once the nut is loose, carefully remove the cable from the terminal and set it aside.
Step 2: Locate the Defroster Blower Motor
The defroster blower motor is typically located behind the glove box or under the dashboard on the passenger side of the car. Consult your car's owner's manual or a repair guide to find the exact location of the motor in your vehicle.
Step 3: Remove the Access Panel
Once you've located the defroster blower motor, you'll need to remove the access panel to gain access to it. The access panel is usually held in place by screws or clips. Use a screwdriver or pliers to remove the screws or clips and carefully remove the panel.
Step 4: Disconnect the Electrical Connector
The defroster blower motor is connected to the car's electrical system by an electrical connector. Locate the connector and use a pair of pliers to gently pull it apart. Be careful not to damage the connector or the wires.
Step 5: Remove the Blower Motor
The blower motor is usually held in place by screws or bolts. Use a socket wrench or screwdriver to remove the screws or bolts and carefully remove the motor from the housing.
Step 6: Install the New Blower Motor
Take the new defroster blower motor and place it in the housing. Make sure the motor is properly aligned and that the mounting holes line up. Use the screws or bolts that you removed earlier to secure the motor in place.
Step 7: Reconnect the Electrical Connector
Once the new blower motor is installed, reconnect the electrical connector. Make sure the connector is securely attached and that there are no loose wires.
Step 8: Replace the Access Panel
Carefully replace the access panel and secure it in place with the screws or clips that you removed earlier.
Step 9: Reconnect the Battery
Finally, reconnect the negative terminal on your car's battery and tighten the nut with a socket wrench.
Step 10: Test the Defroster
Start your car and turn on the defroster to test the new blower motor. Make sure the air is flowing through the defroster vents and that the motor is running smoothly. If you notice any problems, double-check your work and make sure all the connections are secure.
Choosing the Right Defroster Blower Motor
When it comes to choosing a new defroster blower motor for your car, it's important to choose a high-quality product that is compatible with your vehicle. As a defroster supplier, we offer a wide range of defroster blower motors for various makes and models of cars. Our motors are made from high-quality materials and are designed to provide reliable performance.
In addition to defroster blower motors, we also offer a variety of other defroster products, such as Chiller Aluminum Defrost Defrosting Foil Heater Heating Parts, Heating Element Heater For, and Aluminium Aluminum Flexible Thermal 12V Foil Food Heater Heaters. These products are designed to help keep your car's defroster system working properly and efficiently.
Conclusion
Replacing the defroster blower motor in your car is a relatively simple task that can be accomplished with the right tools and a bit of know-how. By following the steps outlined in this blog post, you can save money on costly repairs and ensure that your car's defroster system is working properly. If you have any questions or need further assistance, please don't hesitate to contact us. We're here to help you find the right defroster products for your needs. Whether you're a professional mechanic or a DIY enthusiast, we have the products and expertise to help you get the job done right. Contact us today to discuss your defroster needs and start the procurement negotiation process.


References
- "Automotive Repair Manual" - General automotive repair guide
- Car manufacturer's owner's manual