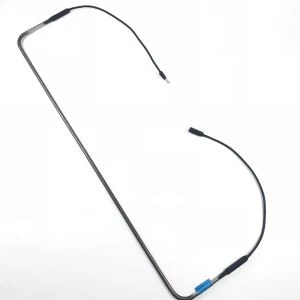
How to Install a PI Heater
As a PI heater supplier, I understand that many customers may be unsure about the installation process of PI heaters. In this blog post, I will guide you through the steps of installing a PI heater, providing you with detailed information and tips to ensure a successful installation.
Understanding PI Heaters
Before we start the installation process, it's important to have a basic understanding of what a PI heater is. PI heaters, also known as Polyimide heaters or Kapton heaters, are flexible and thin film heaters that offer excellent thermal performance. They are widely used in various industries, including aerospace, medical, and electronics, due to their high temperature resistance, uniform heating, and lightweight design.
Tools and Materials Needed
- PI heater
- Mounting hardware (such as screws, adhesive tape, or clips)
- Electrical connectors
- Multimeter (for testing electrical connections)
- Insulation material (optional)
- Safety equipment (gloves, safety glasses)
Step 1: Prepare the Installation Area
The first step in installing a PI heater is to prepare the installation area. This involves cleaning the surface where the heater will be mounted to ensure good adhesion and heat transfer. Use a clean, dry cloth to remove any dirt, dust, or grease from the surface.
If the surface is uneven or rough, you may need to sand it down to create a smooth surface. This will help the heater to conform to the shape of the surface and improve its performance.
Step 2: Position the PI Heater
Once the installation area is prepared, carefully position the PI heater on the surface. Make sure the heater is centered and aligned properly. You can use a template or a marking tool to help you position the heater accurately.
If the heater has a specific orientation or polarity, make sure to follow the manufacturer's instructions. Some PI heaters may have a positive and negative terminal, and it's important to connect them correctly to ensure proper operation.
Step 3: Mount the PI Heater
There are several ways to mount a PI heater, depending on the application and the surface material. Here are some common mounting methods:
- Adhesive Tape: This is the most common method for mounting PI heaters. Use a high-temperature adhesive tape to attach the heater to the surface. Make sure to apply the tape evenly and firmly to ensure good adhesion.
- Screws or Clips: If the surface is made of a rigid material, you can use screws or clips to mount the heater. Drill holes in the surface and insert the screws or clips through the holes in the heater. Tighten the screws or clips securely to hold the heater in place.
- Clamps: For applications where the heater needs to be easily removable, you can use clamps to hold the heater in place. Place the clamps on the edges of the heater and tighten them to secure the heater to the surface.
Step 4: Connect the Electrical Wires
After the PI heater is mounted, it's time to connect the electrical wires. Make sure to use the appropriate electrical connectors and follow the manufacturer's instructions for wiring.
- Identify the Terminals: Locate the positive and negative terminals on the heater. They are usually marked with a "+" and "-" sign.
- Strip the Wires: Use a wire stripper to strip the insulation from the ends of the electrical wires. Make sure to strip enough insulation to expose the bare wire.
- Connect the Wires: Connect the positive wire to the positive terminal and the negative wire to the negative terminal. You can use solder or crimp connectors to make the connection. Make sure the connection is secure and there are no loose wires.
- Insulate the Connections: After making the connection, use electrical insulation tape or heat shrink tubing to insulate the connections. This will prevent short circuits and ensure the safety of the electrical system.
Step 5: Test the PI Heater
Once the electrical connections are made, it's important to test the PI heater to make sure it's working properly. Use a multimeter to measure the resistance of the heater. The resistance value should be within the range specified by the manufacturer.
If the resistance value is too high or too low, there may be a problem with the heater or the electrical connections. Check the connections again to make sure they are secure and there are no loose wires.
After testing the resistance, you can also apply power to the heater and check if it heats up evenly. Use a thermal imaging camera or a temperature sensor to measure the temperature of the heater surface. Make sure the temperature is within the desired range and there are no hot spots or cold spots.
Step 6: Insulate the PI Heater (Optional)
In some applications, it may be necessary to insulate the PI heater to improve its efficiency and reduce heat loss. You can use insulation material such as fiberglass, ceramic fiber, or foam to insulate the heater.
Cut the insulation material to the appropriate size and shape and place it over the heater. Make sure the insulation material covers the entire heater surface and there are no gaps or openings.


Step 7: Final Checks
Before using the PI heater, make a final check to ensure everything is installed correctly. Check the mounting hardware to make sure it's tight and secure. Check the electrical connections to make sure there are no loose wires or exposed conductors.
Also, make sure the heater is not in contact with any flammable materials or other objects that could cause a fire or damage to the heater.
Conclusion
Installing a PI heater is a relatively simple process if you follow the steps outlined in this blog post. By preparing the installation area, positioning the heater correctly, mounting it securely, connecting the electrical wires properly, testing the heater, and insulating it if necessary, you can ensure a successful installation and optimal performance of the PI heater.
If you have any questions or need further assistance with the installation of a PI heater, please feel free to contact us. As a PI heater supplier, we have the expertise and experience to help you choose the right heater for your application and provide you with technical support throughout the installation process.
We offer a wide range of PI heaters, including Plate for Film Ceramica pad, SS film heat, and Kapton Heater Polyimide Heater PI Heater Film Heater. Our heaters are made of high-quality materials and are designed to meet the highest standards of performance and reliability.
If you are interested in purchasing a PI heater or have any questions about our products, please contact us for more information. We look forward to working with you and helping you find the perfect heating solution for your needs.
References
- Manufacturer's installation guides for PI heaters
- Industry standards and best practices for heater installation
- Electrical safety guidelines