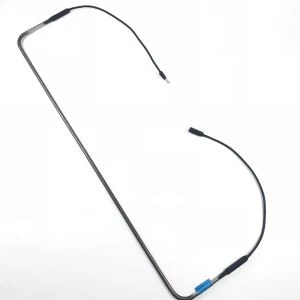
Hey there! As a supplier of Heat Film, I'm super excited to share with you how to install heat film on a glass surface. Whether you're looking to defrost your windows, keep your display cases warm, or add some cozy heat to your glass partitions, this guide will walk you through the process step by step.
Why Choose Heat Film for Glass?
Before we dive into the installation process, let's talk about why heat film is a great choice for glass surfaces. Heat film offers a thin, flexible, and efficient heating solution that can be easily applied to various types of glass. It provides uniform heat distribution, which helps prevent condensation, fogging, and ice buildup on the glass. Plus, it's energy-efficient and can be customized to fit your specific needs.
There are different types of heat film available in the market, such as PET PI Heating Film and SS film heat. Each type has its own unique features and benefits, so make sure to choose the one that suits your application best.
Tools and Materials You'll Need
To install heat film on a glass surface, you'll need the following tools and materials:
- Heat Film: Make sure to choose the right type and size of heat film for your glass surface. You can find a wide range of heat film options on our website Heat Film.
- Cleaning Supplies: You'll need to clean the glass surface thoroughly before installing the heat film. Use a glass cleaner and a lint-free cloth to remove any dirt, dust, or grease from the glass.
- Adhesive Tape or Glue: Depending on the type of heat film you're using, you may need adhesive tape or glue to attach the heat film to the glass surface. Make sure to choose a high-quality adhesive that is suitable for glass.
- Scissors or Utility Knife: You'll need scissors or a utility knife to cut the heat film to the correct size.
- Electrical Tools: If you're connecting the heat film to a power source, you'll need electrical tools such as wire strippers, pliers, and a soldering iron. Make sure to follow all electrical safety guidelines when working with electricity.
Step-by-Step Installation Process
Now that you have all the tools and materials you need, let's get started with the installation process:
- Prepare the Glass Surface: Clean the glass surface thoroughly using a glass cleaner and a lint-free cloth. Make sure the glass is completely dry before proceeding to the next step.
- Measure and Cut the Heat Film: Measure the glass surface and cut the heat film to the correct size using scissors or a utility knife. Make sure to leave some extra film around the edges to ensure a secure fit.
- Apply Adhesive Tape or Glue: If you're using adhesive tape, apply it to the back of the heat film along the edges. If you're using glue, apply a thin layer of glue to the glass surface and spread it evenly using a brush or a roller.
- Attach the Heat Film to the Glass: Carefully place the heat film on the glass surface, starting from one corner and working your way across. Use a squeegee or a credit card to smooth out any air bubbles or wrinkles in the film. Make sure the film is firmly attached to the glass.
- Connect the Heat Film to a Power Source: If you're connecting the heat film to a power source, follow the manufacturer's instructions carefully. Use wire strippers to remove the insulation from the wires, and then connect the wires to the heat film using a soldering iron or electrical connectors. Make sure to test the heat film before covering it with any insulation or protective layer.
- Insulate and Protect the Heat Film: Once the heat film is connected to a power source, you may want to insulate and protect it using insulation tape or a protective layer. This will help prevent heat loss and protect the heat film from damage.
- Test the Heat Film: Turn on the power and test the heat film to make sure it's working properly. Check for any hot spots or areas of uneven heating. If you notice any problems, turn off the power immediately and check the connections.
Tips and Tricks
Here are some tips and tricks to help you install heat film on a glass surface successfully:
- Work in a Clean and Dry Environment: Make sure to work in a clean and dry environment to prevent dirt, dust, or moisture from getting between the heat film and the glass surface.
- Take Your Time: Installing heat film on a glass surface can be a time-consuming process, so make sure to take your time and do it right. Rushing through the installation process can lead to mistakes and problems later on.
- Follow the Manufacturer's Instructions: Make sure to follow the manufacturer's instructions carefully when installing the heat film. Different types of heat film may have different installation requirements, so it's important to read the instructions thoroughly before starting the installation process.
- Test the Heat Film Before Use: Before using the heat film, make sure to test it to make sure it's working properly. This will help you identify any problems or issues before they become a bigger problem.
Conclusion
Installing heat film on a glass surface is a relatively simple process that can be done by anyone with basic DIY skills. By following the steps outlined in this guide and using the right tools and materials, you can install heat film on your glass surface quickly and easily.
If you have any questions or need further assistance with installing heat film on a glass surface, please don't hesitate to contact us. We're a leading supplier of heat film, and we're here to help you find the right solution for your needs. Whether you're looking for PET PI Heating Film, SS film heat, or any other type of heat film, we have a wide range of options to choose from on our website Heat Film.


So, what are you waiting for? Contact us today to learn more about our heat film products and to start your installation project. We look forward to working with you!
References
- Manufacturer's instructions for the heat film
- Electrical safety guidelines
- DIY home improvement resources