A malfunctioning HVAC (Heating, Ventilation, and Air Conditioning) duct can significantly impact the efficiency of your system and the comfort of your home or office. In this blog, as an HVAC parts supplier, I'll guide you through the process of repairing a broken HVAC duct, sharing professional insights and tips along the way.
Step 1: Inspection and Diagnosis
Before you can start the repair, it's crucial to identify the problem areas. Begin by visually inspecting the ducts. Look for obvious signs of damage such as holes, tears, loose connections, or leaks. You can also use a smoke pencil or an incense stick to detect air leaks. When the smoke is near a leak, it will be drawn into or out of the duct.
Pay close attention to areas where the ducts connect, such as joints and seams. These are common places for leaks to occur. Additionally, check for any signs of mold or mildew, as this can indicate a moisture problem within the ductwork.
Step 2: Gather the Necessary Tools and Materials
Once you've identified the damaged areas, it's time to gather the tools and materials you'll need for the repair. As an HVAC parts supplier, I can recommend the following essentials:
- Duct tape: This is a quick and easy way to seal small holes and tears. Make sure to use foil-backed duct tape, as it's more durable and resistant to heat and moisture.
- Mastic sealant: For larger holes and leaks, mastic sealant is a better option. It provides a more permanent seal and is ideal for sealing joints and seams.
- Duct insulation: If the damaged area is exposed to the elements or if you want to improve the energy efficiency of your system, consider adding duct insulation.
- Sheet metal: For severe damage, you may need to replace a section of the duct. Sheet metal can be used to fabricate a new section of the duct.
- Screwdriver, utility knife, and other basic hand tools: These will be useful for removing and installing ductwork components.
Step 3: Prepare the Work Area
Before you start the repair, it's important to prepare the work area. Turn off the HVAC system to prevent any dust or debris from being circulated throughout the building. Cover the surrounding area with drop cloths to protect the floors and furniture from dirt and debris.
Step 4: Repairing Small Holes and Tears
If you've found small holes or tears in the duct, you can use duct tape to seal them. First, clean the area around the hole or tear with a damp cloth to remove any dirt or debris. Then, cut a piece of duct tape that is slightly larger than the hole or tear. Apply the duct tape firmly to the surface of the duct, making sure to smooth out any wrinkles or bubbles.
For a more permanent repair, you can use mastic sealant. Apply the sealant to the hole or tear using a putty knife or a caulking gun. Make sure to cover the entire area and smooth out the sealant with a tool. Allow the sealant to dry completely before turning the HVAC system back on.
Step 5: Repairing Larger Holes and Leaks
For larger holes and leaks, mastic sealant is the best option. First, clean the area around the hole or leak with a damp cloth to remove any dirt or debris. Then, apply the mastic sealant to the hole or leak using a putty knife or a caulking gun. Make sure to cover the entire area and smooth out the sealant with a tool.
If the hole or leak is particularly large, you may need to use a patch to reinforce the repair. Cut a piece of sheet metal or fiberglass mesh that is slightly larger than the hole or leak. Apply a thin layer of mastic sealant to the patch and press it firmly onto the damaged area. Make sure to smooth out any wrinkles or bubbles and allow the sealant to dry completely.


Step 6: Repairing Loose Connections
Loose connections between ducts can cause air leaks and reduce the efficiency of your HVAC system. To repair loose connections, start by identifying the affected area. Use a screwdriver to remove any screws or fasteners that are holding the ducts together.
Clean the surfaces of the ducts with a damp cloth to remove any dirt or debris. Apply a thin layer of mastic sealant to the edges of the ducts. Reconnect the ducts and secure them with screws or fasteners. Make sure to tighten the screws or fasteners securely to prevent air leaks.
Step 7: Insulating the Ducts
Adding insulation to your ducts can help improve the energy efficiency of your HVAC system and reduce your energy costs. You can purchase insulation specifically designed for HVAC ducts at most hardware stores or from an HVAC parts supplier like us.
Start by measuring the length and circumference of the duct. Cut the insulation to the appropriate size and wrap it around the duct. Use duct tape or insulation adhesive to secure the insulation in place. Make sure to cover all exposed areas of the duct, including joints and seams.
Step 8: Testing the System
Once you've completed the repair and insulation, it's time to test the HVAC system. Turn the system back on and let it run for a few minutes. Check for any signs of air leaks or other problems. Use a thermometer to measure the temperature in different rooms of the building to ensure that the system is working properly.
If you notice any issues, such as uneven heating or cooling or excessive noise, turn off the system and inspect the ducts again. Make any necessary repairs or adjustments and test the system again until it is working correctly.
Step 9: Maintenance Tips
To prevent future problems with your HVAC ducts, it's important to perform regular maintenance. Here are some tips to keep your ducts in good condition:
- Change the air filters regularly: Clogged air filters can reduce the efficiency of your HVAC system and cause dirt and debris to accumulate in the ducts.
- Inspect the ducts periodically: Check the ducts for signs of damage, leaks, or mold. Address any issues promptly to prevent further damage.
- Keep the area around the ducts clean: Remove any debris or clutter from around the ducts to prevent blockages.
- Schedule professional maintenance: Have your HVAC system inspected and maintained by a professional technician at least once a year.
Guiding to Contact for Purchase
As an HVAC parts supplier, we offer a wide range of high - quality HVAC parts to meet your repair and maintenance needs. Whether you need duct tape, mastic sealant, insulation, or any other HVAC components, we have you covered. If you're in the process of repairing your HVAC ducts or planning future maintenance, make sure to check out our products.
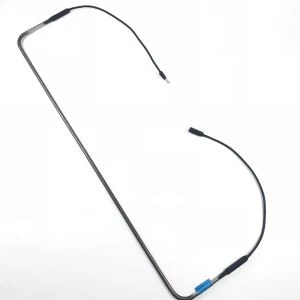
You can find some of our top - selling products on our website. For instance, our Tubular Heat Exchanger Heater Heating Tube Pipe Element is a reliable choice for many heating applications. If you're looking for an Air Conditioner Air Heater Dryer Finned Tubular Heater Heating Element, we have that too. And our Fin Heating Element And Fin Heater Tube And Fin Heater Element is well - received by our customers.
If you have any questions about our products or need assistance with your HVAC repair project, feel free to reach out to us. We're here to help you make the best decisions for your HVAC system. Contact us today to start the procurement negotiation and find the perfect HVAC parts for your needs.
References
- American Society of Heating, Refrigerating and Air - Conditioning Engineers (ASHRAE). (2020). ASHRAE Handbook - Fundamentals.
- Air Conditioning Contractors of America (ACCA). (2019). Manual D: Residential Duct Systems.
- National Air Duct Cleaners Association (NADCA). (2021). ACR 2021 Standard.