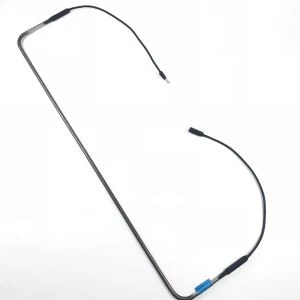
Hey there, folks! I'm a supplier of HVAC parts, and I know how frustrating it can be when your HVAC thermostat starts acting up. But don't worry, replacing an HVAC thermostat isn't as complicated as it might seem. In this blog post, I'll walk you through the process step by step.
Why Replace Your HVAC Thermostat?
First off, let's talk about why you might want to replace your thermostat. There are a few reasons. Maybe your old thermostat is just plain old and not working as well as it used to. It could be giving inaccurate temperature readings, or it might not be able to control your HVAC system properly. Another reason could be that you want to upgrade to a smart thermostat. Smart thermostats offer a bunch of cool features like remote control via your smartphone, learning your temperature preferences over time, and energy-saving settings.
Tools and Materials You'll Need
Before you start replacing your thermostat, you'll need to gather a few tools and materials. Here's what you'll need:
- A new thermostat (make sure it's compatible with your HVAC system)
- A screwdriver (usually a Phillips head, but check your old thermostat to be sure)
- A voltage tester
- Wire strippers
- Electrical tape
- A level
Step 1: Turn Off the Power
Safety first, right? Before you start working on your thermostat, you need to turn off the power to your HVAC system. You can do this by switching off the circuit breaker that controls your HVAC unit. This will prevent any electrical shocks while you're working.
Step 2: Remove the Old Thermostat
Once the power is off, it's time to remove the old thermostat. Start by using your screwdriver to remove the cover of the thermostat. Under the cover, you'll see the wires connected to the thermostat terminals. Take a picture of the wiring setup or make a diagram so you know how to connect the wires to the new thermostat. Then, use your screwdriver to loosen the terminal screws and gently pull the wires out. Finally, remove the thermostat from the wall.
Step 3: Check the Wiring Condition
Now that you've removed your old thermostat, take a look at the wiring. Check for any signs of damage, like frayed or corroded wires. If you find any damaged wires, you'll need to replace them. You can use wire strippers to cut off the damaged part and strip the ends of the new wire so you can connect it properly.
Step 4: Mount the New Thermostat
Before you mount the new thermostat, make sure it's level. Use a level to check and adjust it as needed. Then, use the screws that came with the new thermostat to mount it to the wall. Make sure it's securely attached.
Step 5: Connect the Wires
This is the most important step. Refer to the picture or diagram you took earlier to connect the wires to the correct terminals on the new thermostat. Tighten the terminal screws to secure the wires. If you're using a smart thermostat, you might need to connect some additional wires for features like Wi-Fi or power. Follow the manufacturer's instructions carefully.
Step 6: Test the Thermostat
Once you've connected all the wires, it's time to test the thermostat. First, turn the power back on at the circuit breaker. Then, set the thermostat to your desired temperature and mode (heating or cooling). Wait a few minutes and see if your HVAC system starts working. If it doesn't, double-check your wiring connections and make sure the thermostat is set up correctly.


Step 7: Install the Thermostat Cover
If everything is working properly, it's time to install the cover of the new thermostat. Use your screwdriver to attach the cover securely.
Tips and Tricks
- When choosing a new thermostat, consider the features you want. For example, if you're away from home a lot, a smart thermostat with remote control might be a great option.
- If you're not comfortable doing the replacement yourself, it's always a good idea to hire a professional HVAC technician.
- Keep your old thermostat as a backup in case something goes wrong with the new one.
Related HVAC Parts
As an HVAC parts supplier, I want to mention some of the other parts that might be useful for your HVAC system. We offer a wide range of high-quality heating elements, such as the Straight Tubular Fin Heating Element, Stainless Steel Finned Heating Tube, and Tubular Fin Heating Element. These parts are designed to provide efficient and reliable heating for your HVAC system.
Contact Us for Your HVAC Parts Needs
If you're in the market for HVAC parts, whether it's a new thermostat or other components, we're here to help. We have a large inventory of high-quality parts at competitive prices. Just reach out to us, and our team will be happy to assist you with your purchase and answer any questions you might have. Don't hesitate to get in touch for all your HVAC parts requirements.
References
- HVAC Installation and Repair Manuals
- Manufacturer's Instructions for Thermostats and HVAC Systems
So there you have it, folks! Replacing an HVAC thermostat is a task that you can definitely tackle on your own with a little bit of know-how and the right tools. If you have any questions or need more information about HVAC parts, feel free to reach out. Good luck with your thermostat replacement!