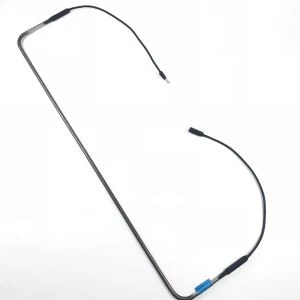
Connecting a heat plate to a power source is a crucial step that requires careful consideration and proper execution. As a heat plate supplier, I've witnessed firsthand the importance of a correct power connection for the optimal performance and safety of these devices. In this blog post, I'll guide you through the process of connecting a heat plate to a power source, covering everything from understanding the basics to troubleshooting common issues.
Understanding Your Heat Plate
Before you start connecting your heat plate to a power source, it's essential to understand its specifications. Different heat plates have varying power requirements, voltage ratings, and amperage limits. These details are usually provided in the product manual or on a label attached to the heat plate.
The power rating of a heat plate is measured in watts (W) and indicates how much electrical energy it consumes per unit of time. The voltage rating, measured in volts (V), specifies the electrical potential difference required for the heat plate to operate correctly. The amperage, measured in amperes (A), represents the flow of electric current through the heat plate.
For example, a heat plate with a power rating of 1000W and a voltage rating of 220V will draw approximately 4.5A of current (using the formula P = VI, where P is power, V is voltage, and I is current). Understanding these values is crucial for selecting the appropriate power source and ensuring safe operation.
Selecting the Right Power Source
Once you've determined the power requirements of your heat plate, the next step is to select the right power source. There are several options available, including standard electrical outlets, power strips, and specialized power supplies.
- Standard Electrical Outlets: Most heat plates can be connected directly to a standard electrical outlet. However, it's important to ensure that the outlet's voltage and amperage ratings match the requirements of the heat plate. In the United States, standard electrical outlets typically provide 120V, while in many other countries, they provide 220V.
- Power Strips: Power strips can be a convenient way to connect multiple devices to a single outlet. However, it's important to check the power strip's maximum power rating to ensure that it can handle the combined power requirements of all the connected devices. Overloading a power strip can cause overheating and pose a fire hazard.
- Specialized Power Supplies: In some cases, you may need to use a specialized power supply to connect your heat plate. This is particularly true for heat plates with non-standard power requirements or those used in industrial applications. Specialized power supplies can provide a stable and regulated power output, ensuring optimal performance and safety.
Preparing for the Connection
Before connecting your heat plate to the power source, it's important to take some safety precautions. Here are some steps to follow:
- Turn off the Power: Before making any electrical connections, turn off the power at the circuit breaker or fuse box. This will prevent the risk of electric shock.
- Inspect the Heat Plate and Power Cord: Check the heat plate and power cord for any signs of damage, such as frayed wires or loose connections. If you notice any damage, do not use the heat plate and contact a qualified technician for repairs.
- Ensure Proper Ventilation: Heat plates generate a significant amount of heat, so it's important to ensure that they are placed in a well-ventilated area. This will prevent overheating and extend the lifespan of the heat plate.
Making the Connection
Once you've prepared for the connection, it's time to connect the heat plate to the power source. Here's a step-by-step guide:
- Locate the Power Input on the Heat Plate: The power input on the heat plate is usually a female socket or a set of terminals. Refer to the product manual for the exact location.
- Insert the Power Cord Plug: Insert the plug of the power cord into the power input on the heat plate. Make sure the plug is fully inserted and that the connection is secure.
- Connect the Power Cord to the Power Source: Plug the other end of the power cord into the selected power source, such as a standard electrical outlet or a power strip. Again, make sure the connection is secure.
- Turn on the Power: Once the connections are made, turn on the power at the circuit breaker or fuse box. Then, turn on the heat plate using the control switch or thermostat.
Testing the Connection
After making the connection, it's important to test the heat plate to ensure that it's working properly. Here's how to do it:
- Check for Power: Look for any indicator lights on the heat plate or power cord to confirm that the heat plate is receiving power. If there are no indicator lights, you can use a multimeter to check the voltage at the power input on the heat plate.
- Monitor the Temperature: Set the heat plate to a low temperature setting and monitor the temperature using a thermometer. The temperature should gradually increase and stabilize at the set temperature. If the temperature does not increase or if it fluctuates wildly, there may be a problem with the connection or the heat plate itself.
- Check for Overheating: After a few minutes of operation, touch the heat plate gently to check for overheating. If the heat plate feels excessively hot or if you notice any burning smells, turn off the power immediately and disconnect the heat plate.
Troubleshooting Common Issues
If you encounter any problems during the connection or operation of the heat plate, here are some common issues and their solutions:
- No Power: If the heat plate is not receiving power, check the circuit breaker or fuse box to make sure the power is turned on. Also, check the power cord and connections for any damage or loose connections.
- Overheating: If the heat plate is overheating, check the ventilation to ensure that it's not blocked. You may also need to reduce the temperature setting or contact a qualified technician for further inspection.
- Inconsistent Temperature: If the temperature of the heat plate is inconsistent, check the thermostat or control switch to make sure it's working properly. You may also need to calibrate the thermostat or replace it if it's defective.
Conclusion
Connecting a heat plate to a power source is a relatively straightforward process, but it requires careful attention to detail and safety precautions. By understanding the power requirements of your heat plate, selecting the right power source, and following the proper connection procedures, you can ensure optimal performance and safety.
As a heat plate supplier, we offer a wide range of high-quality heat plates and related products, including the Oven Heating Element Dia 6.5MM, Hot Selling 2000W Heating Element For Heating Machine, and OEM Oven Heating Element. If you have any questions or need assistance with connecting your heat plate to a power source, please don't hesitate to contact us. We're here to help you make the right choice and ensure a successful installation.


References
- Electrical Safety Foundation International. (n.d.). Electrical Safety Tips. Retrieved from [Website URL]
- National Fire Protection Association. (n.d.). Electrical Fire Safety. Retrieved from [Website URL]
- Heat Plate Manufacturer's Manual. (Year). [Model Number]. Retrieved from [Website URL]